
1: Designing the Favicon
Design your favicon with simplicity and brand identity in mind. Due to its small size, a favicon should be easily recognizable at a glance. Utilize your brand's colors and aim for a minimalist design that encapsulates your brand's essence. Often your company logo or a portion of your company logo can be converted into a favicon.
Let's use Cayenne Design's logo as an example. I removed the pepper icon from the logo and saved it as a jpg. A png would have been ok as well.
2: Saving the Favicon
After finalizing the image you want to use as a base for your favicon, we now need to upload it to a free online image converter that will change your image into the ico format.
Be Careful choosing your online converter!
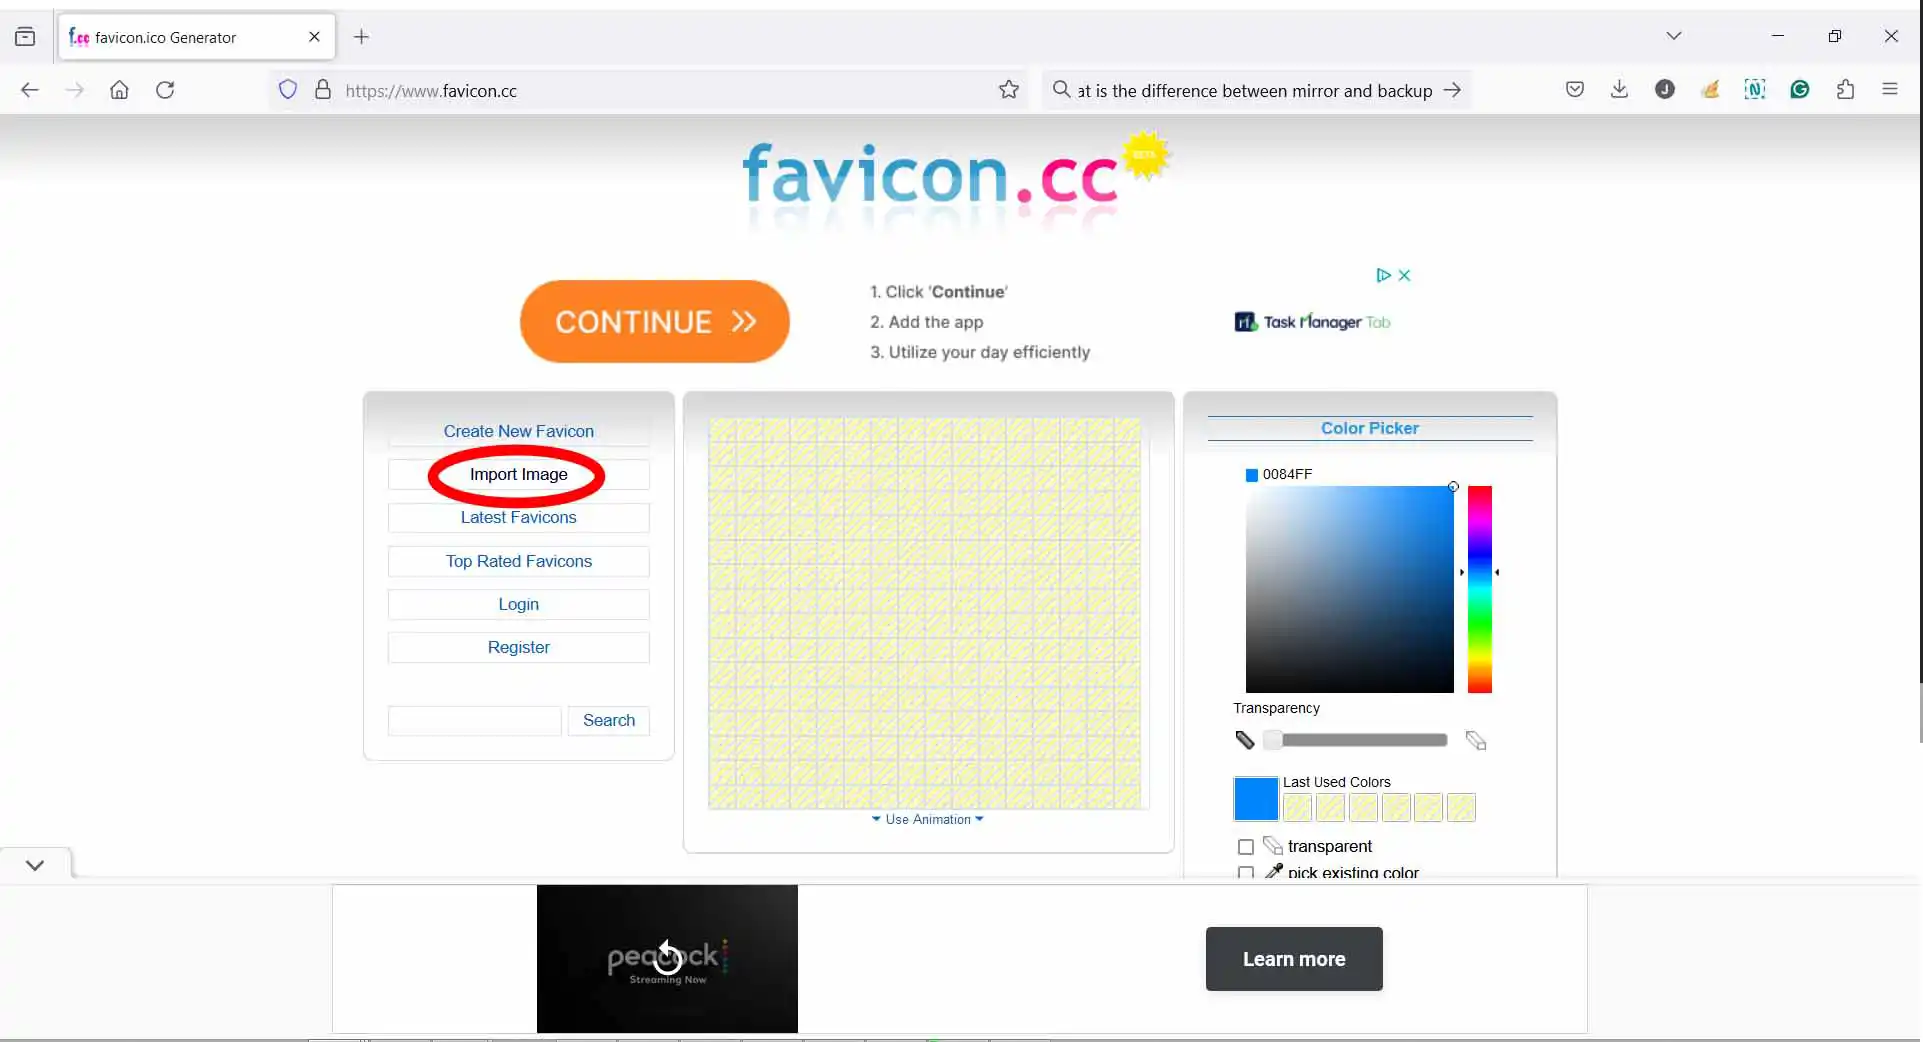
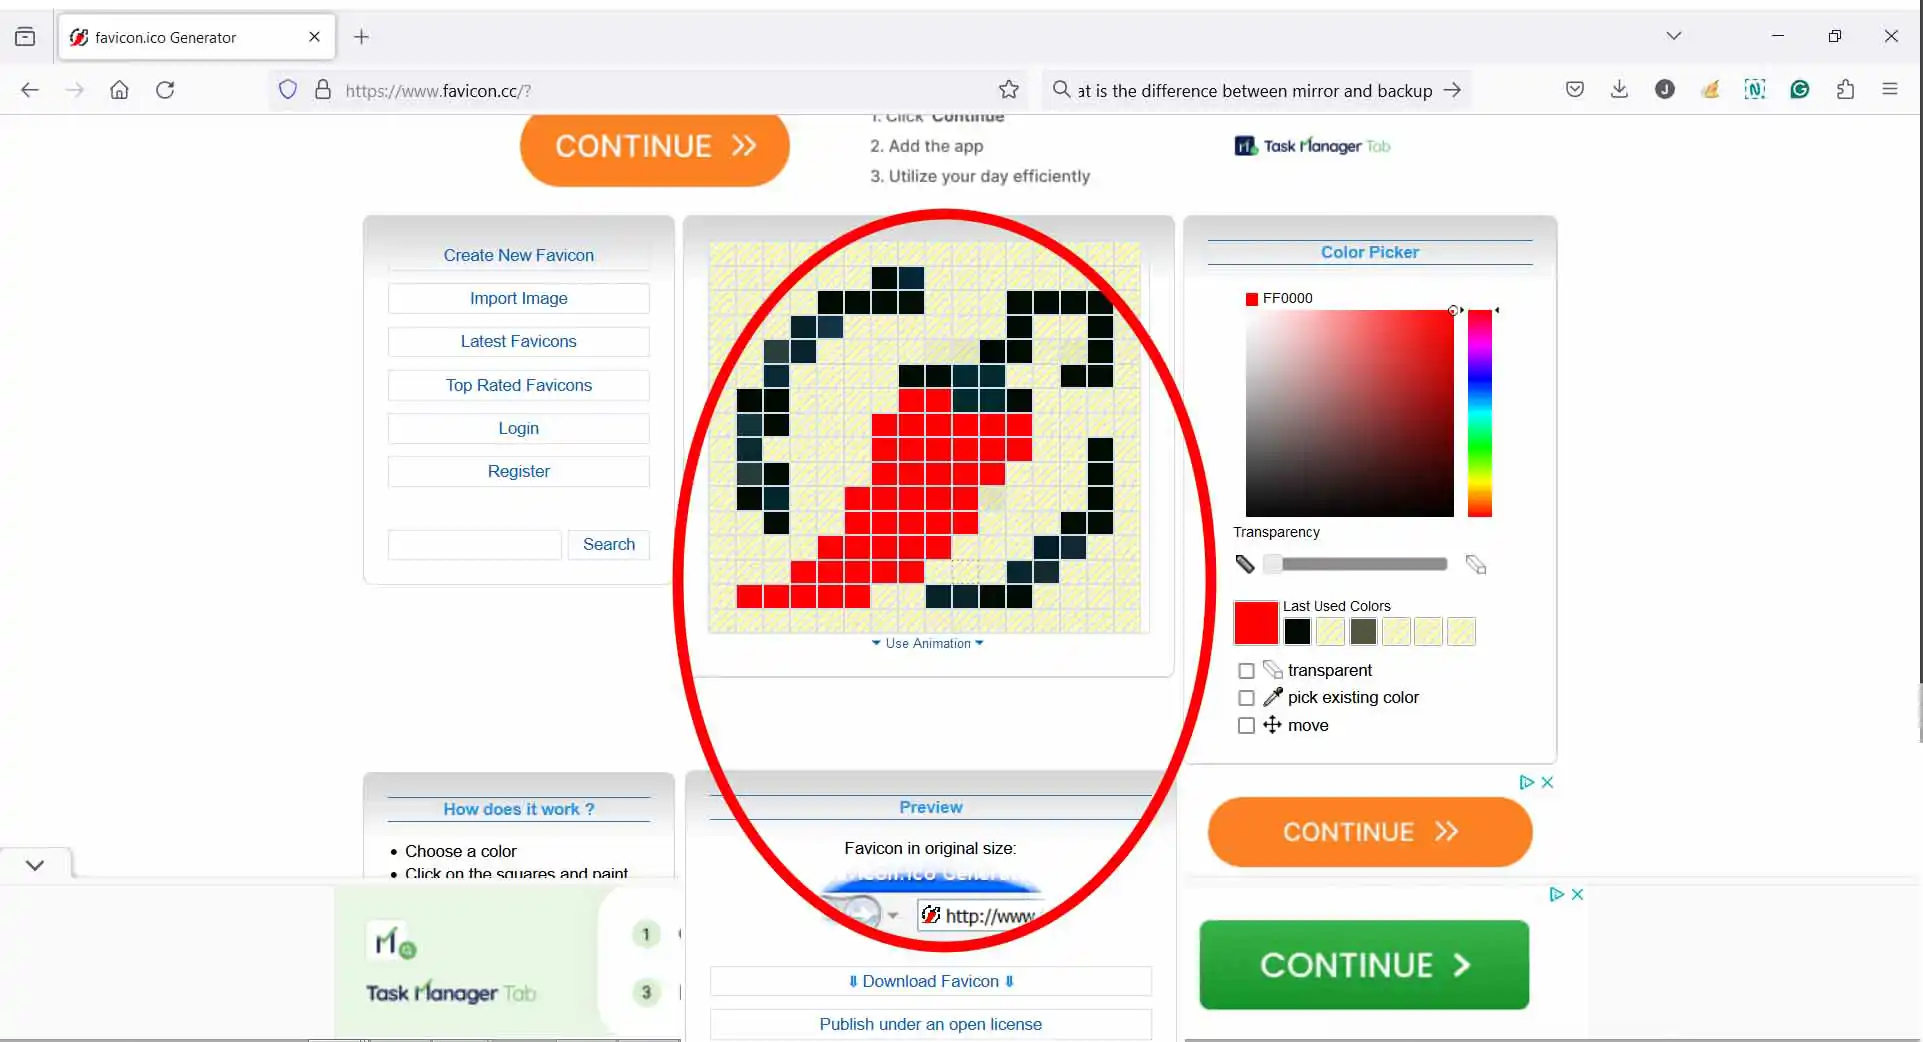
You will find a huge number of online converters available. A large majority of them have [Continue] buttons well placed so that you mistakenly get repointed to a website asking you to download whatever app they are pushing. I use favicon.cc. Yes, it has a few unnecessary links but for the most part, it is straightforward. It also provides you with an editor enabling you to change colors and pixel layout. This is extremely beneficial as a large image is reduced to the small size of the ico image some of the icon edges become shades of color making the icon difficult to distinguish. You can see how I edited my ico in Steps 5 and 6 below.
Step One: In your browser, go to www.favicon.ico website and click on the [Import Image] button.
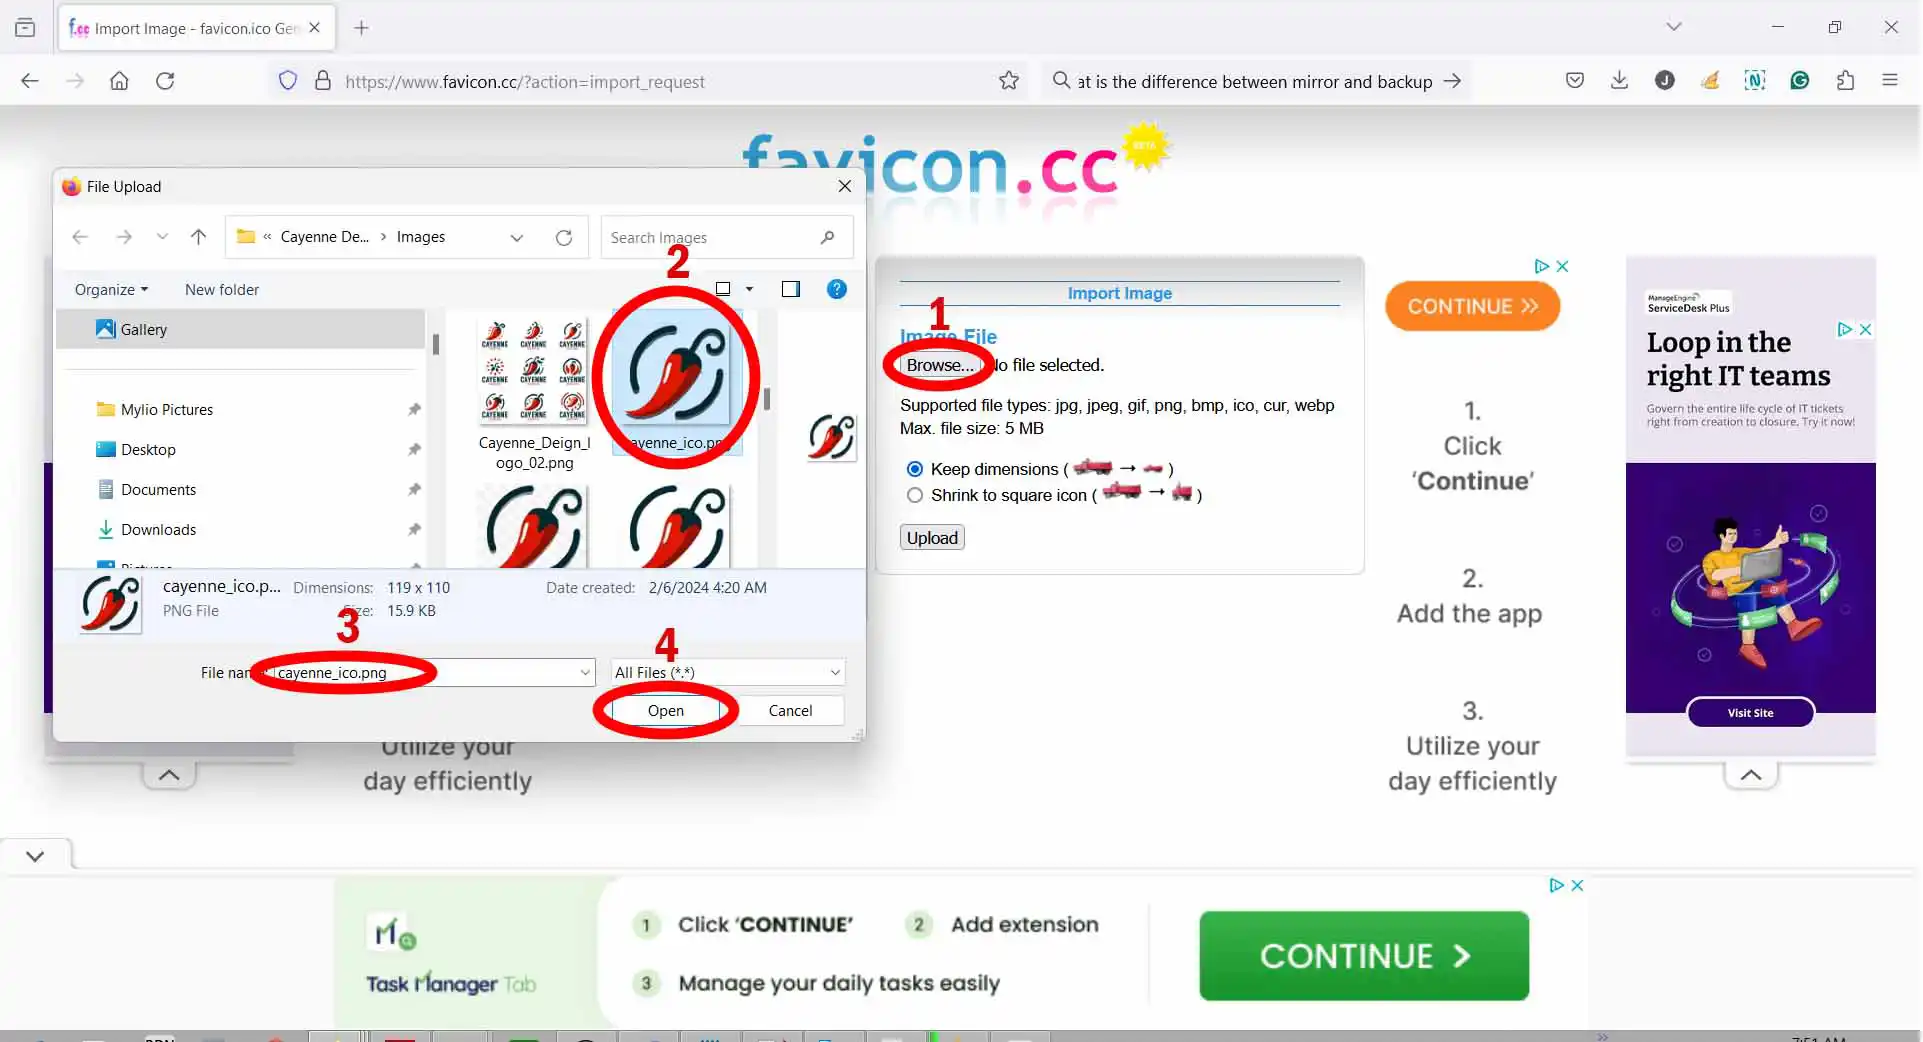
Step Two: Follow the numbered sequence and select the image that you want to upload to favicon.
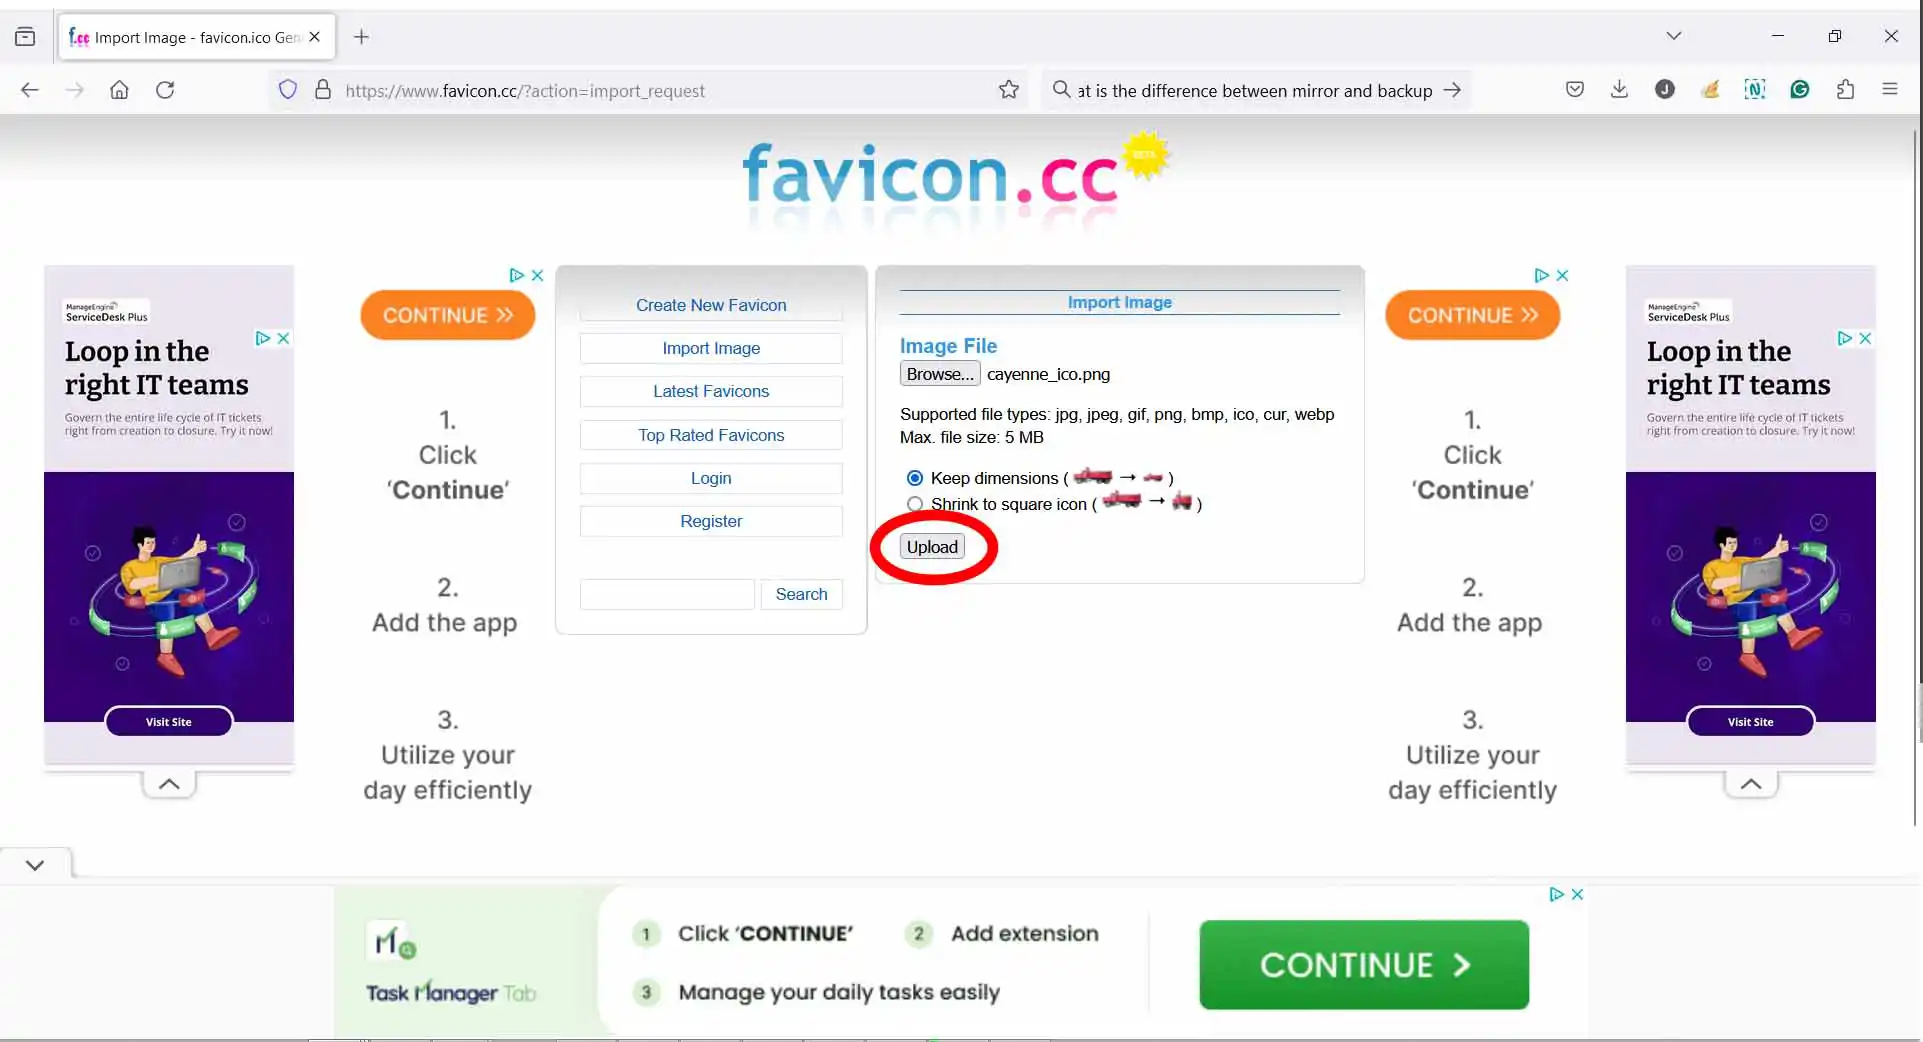
Step Three: Click on the [Upload] button.
Step Four: As shown, you will see the converted image displayed in pixels on the edit screen. Using favicon's tools, edit the image so that the image displays vividly.
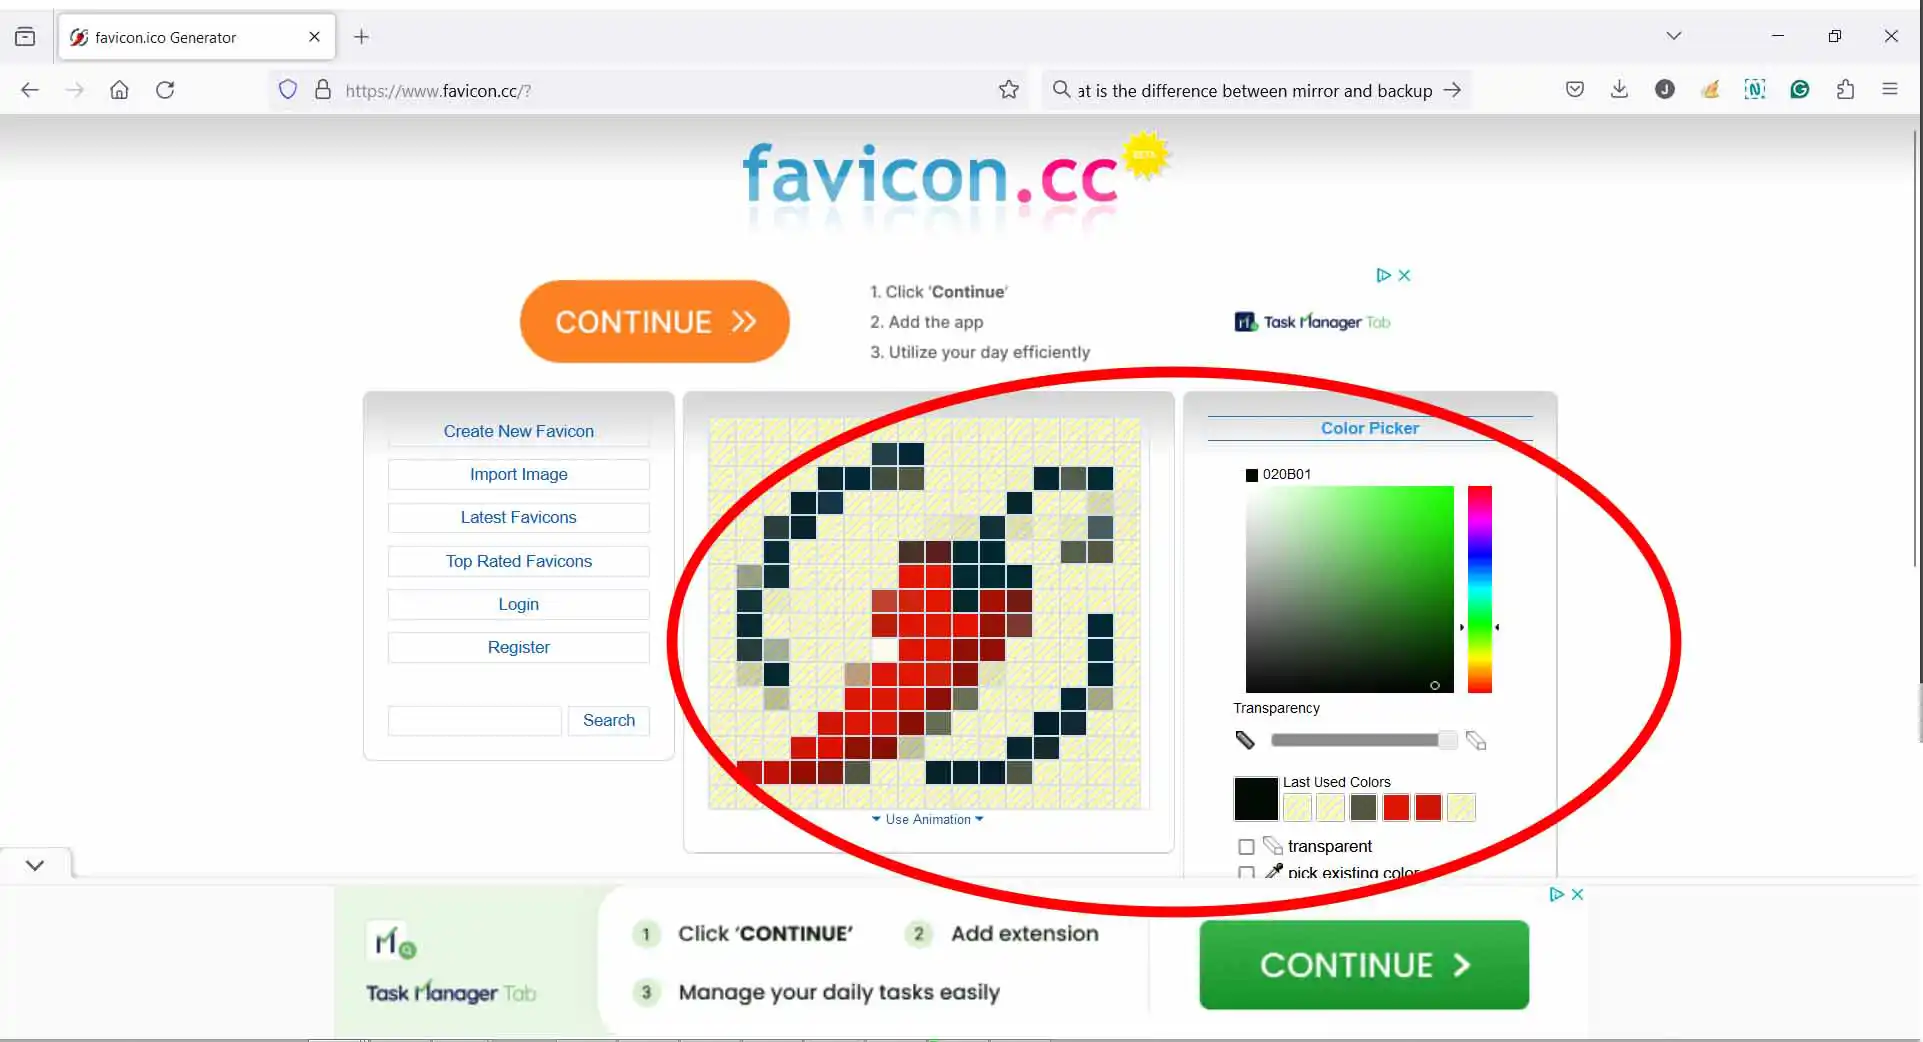
Step Five: As you edit your icon, notice that a smaller version below the editing screen also displays the edited version as seen in a browser. Use this view as a means to perfect your image.
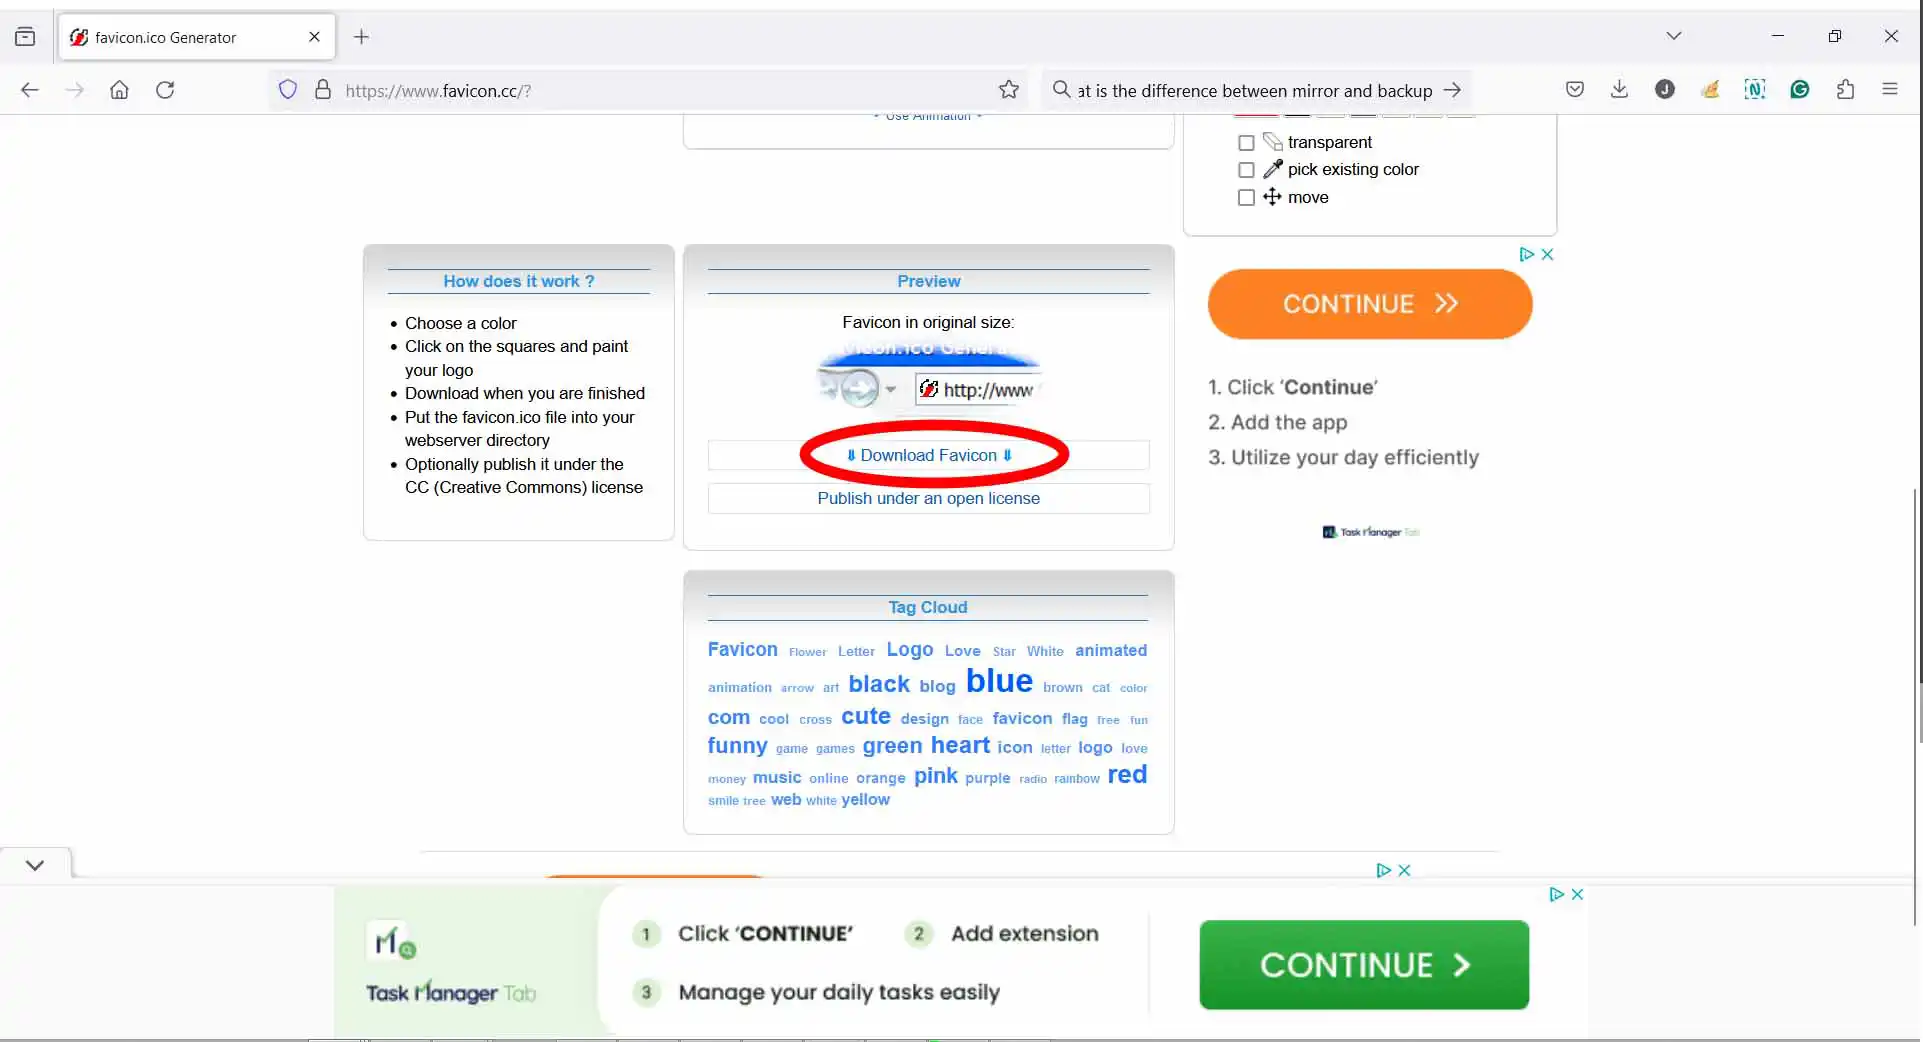
Step Six: Once you are satisfied with your edited ico image, download it to your PC. In the next section, we will learn how to place it in your Joomla website so that it is displayed in the top of a browser when a guest visits your website.
There is more to the story!
We succeeded in creating our .ico image, but this is not the end of the story. The .ico format is becoming outdated and replaced by .png, .svg, and .webp formats for favicons. The article, "Favicons: Importance, Formats, and Sizes," provides an overview of these new formats as well as information on how to make and employ them in your website.
ChatGPT Acknowledgment